Businesses in modern data-driven economy depend on powerful tools to evaluate and present data in order to make decisions. One of the top business intelligence tools is Tableau, which enables users to make dashboards that are dynamic and shareable. The cloud-based data warehousing platform Snowflake has become very popular due to its simplicity, performance, and scalability. Tableau Snowflake work to provide a potent mix for contemporary data analytics.
This blog discusses setup, best practices, and performance-enhancing advice for integrating Snowflake with Tableau.

Overview of Tableau Snowflake
A cloud-native data warehousing technology, Snowflake offers smooth data processing, querying, and storage. Because of its distinct design, customers can increase computation and storage separately.
Tableau is a well-known data visualisation platform that uses user-friendly dashboards and analytics to assist users in turning raw data into insights that can be put to use. With Tableau’s drag-and-drop feature, users can construct intricate visualisations without needing to know how to code.
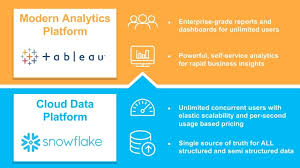
By integrating Snowflake and Tableau, businesses can take advantage of both platforms’ full potential and guarantee easy access to scalable data storage and powerful visualisations. (Ref: Integrating Tableau Machine Learning for Advanced Analytics)
Principal Advantages of Combining Tableau Snowflake Scalability
Tableau can query data without bottlenecks thanks to Snowflake’s dynamic scalability, which guarantees that even big datasets are processed effectively.
Speed: Snowflake’s high-performance architecture facilitates real-time data querying and delivery, which Tableau leverages for quick visualization updates.
Ease of Use: Tableau’s intuitive interface combined with Snowflake’s simplicity means that users can set up and manage the integration without significant technical overhead.
Security: Snowflake’s robust security features, such as end-to-end encryption and role-based access control, ensure that data remains secure during analysis in Tableau Snowflake.
Cost Efficiency: The pay-per-use pricing model of Snowflake, combined with Tableau’s scalable licensing options, optimizes costs for organizations.
Setting Up the Snowflake-Tableau Connection
The integration process of Tableau Snowflake is straightforward. Here’s a step-by-step guide:
Step 1: Prepare Snowflake
Create a Database: Ensure the data you want to visualize in Tableau is organized within a Snowflake database.
Define Roles and Permissions:
Assign appropriate roles and permissions for Tableau users to access the necessary data.
Use GRANT commands to provide read-only access if needed:
sql
GRANT SELECT ON DATABASE your_database TO ROLE tableau_user;
Enable Connectivity: Snowflake supports JDBC and ODBC drivers for Tableau connectivity. Ensure these are installed and configured.
Step 2: Install Tableau Desktop
Download and install Tableau Desktop from the official Tableau website.
Ensure you have a valid Tableau license to unlock full features.
Step 3: Connect Tableau to Snowflake
Open Tableau Desktop and click on Connect in the left-hand pane.
Select Snowflake from the list of available connectors.
Enter the following details:
Server: Snowflake account URL (e.g., youraccount.snowflakecomputing.com).
Warehouse: The Tableau Snowflake warehouse to execute queries.
Database: The target database.
Schema: The schema containing your tables.
Role: The Snowflake role for the connection.
Authenticate using your Snowflake credentials.
Step 4: Import Data
Once connected, you can import tables or execute custom SQL queries to define your data source.
Creating Visualizations in Tableau with Snowflake Data
After successfully connecting Tableau to Snowflake, you can start creating visualizations:
1.Build Your Data Source
Use Tableau’s Data Source tab to organize, join, or blend data as needed.
Optimize data models by creating relationships between tables.
2.Create Dashboards
Drag and drop dimensions and measures onto Tableau’s shelves (e.g., Rows, Columns, Marks).
Apply filters, calculated fields, and parameters for dynamic visualizations.
Use Tableau’s visualization types (e.g., heat maps, bar charts, and scatter plots) to represent your data effectively.
3.Enhance Interactivity
Add filters, parameters, and actions to enable users to interact with dashboards.
Incorporate live connections or extracts based on your performance needs.
4.Publish Dashboards
Publish your dashboards to Tableau Server or Tableau Cloud for sharing and collaboration.
Best Practices for Using Snowflake with Tableau
5.Optimize Queries
Use Snowflake’s query history and query profiler to monitor and improve performance.
Leverage materialized views or pre-aggregated tables in Snowflake for frequently accessed data.
6.Manage Data Extracts
Decide between live connections (real-time updates) and data extracts (pre-loaded data).
Use extracts for high-performance dashboards when real-time updates are unnecessary.
7.Monitor Costs
Snowflake charges based on compute and storage usage. Optimize your queries and warehouse usage to avoid unnecessary costs.
Shut down idle warehouses to reduce costs.
8.Ensure Data Security
Use Snowflake’s role-based access controls to limit data exposure.
Encrypt sensitive data both in transit and at rest.
9.Tune Tableau Performance
Use Tableau’s performance recorder to identify bottlenecks.
Reduce the number of filters, calculations, or blended data sources when possible.
Common Challenges and How to Address Them
Challenge 1: Query Performance Issues
Solution: Optimize Tableau Snowflake queries by indexing columns, restructuring data models, or caching results where feasible.
Challenge 2: Connection Errors
Solution: Verify that your Snowflake credentials, warehouse settings, and Tableau driver installations are correct.
Challenge 3: High Costs
Solution: Monitor warehouse usage and avoid running unnecessary queries or maintaining idle connections.
Challenge 4: Complex Data Models
Solution: Simplify data models by flattening hierarchies or denormalizing tables when needed.
Advanced Techniques
1.Using Tableau Snowflake Features for Analytics
Streams and Tasks: Automate data updates for real-time analytics.
Time Travel: Access historical data directly in Tableau for comparative analysis.
Secure Data Sharing: Share data across teams or external organizations without data duplication.
2.Tableau Calculations and Snowflake Functions
Combine Tableau’s calculated fields with Snowflake’s built-in SQL functions for advanced analytics.
Example: Use Snowflake’s date functions within Tableau queries to calculate rolling averages.
3.Leveraging Tableau Hyper Extracts
Create Hyper extracts for faster data processing when working with large datasets.
Schedule automatic updates to keep extracts synchronized with Snowflake.
Case Study: Real-World Use of Tableau Snowflake
Scenario: A retail company uses Snowflake for data storage and Tableau for sales analysis.
Problem: The company struggled with slow dashboard performance and escalating Snowflake costs.
Solution:
-They implemented pre-aggregated tables in Snowflake to reduce query complexity.
-Tableau extracts were used for historical sales data, while live connections were reserved for real-time inventory updates.
Outcome: Dashboard load times improved by 50%, and Snowflake costs decreased by 30%.
Final Thoughts
Integrating Tableau Snowflake unlocks tremendous potential for businesses to analyze and visualize data effectively. By following the setup process, leveraging best practices, and addressing common challenges, organizations can maximize the value of their data.
With the right strategy and optimization techniques, Tableau Snowflake can transform raw data into meaningful insights, empowering decision-makers to drive business success.


